
You’ve probably already discovered that adding images to your blog posts is a good way to make your blog more appealing to readers. It’s extra work though: finding the right image, saving it to a local file, cropping or sizing the image as needed, and then uploading it to your post.
I’ve long advocated that a great blogging editor would make picking, clipping and posting images from other sites trivial, but alas no editors do this yet. (I can’t find my blog post right now suggesting one way to implement this, but a high-level description is: you add a link to your posts, the tool goes out and scrapes the linked content for images, from which you can pick what you’d like to add to your post with minimally only one click. That’s as easy as it should be.)
 Here’s a trick I use with no more than Vista’s provided tools to easily clip and post image content to my blog. (I’m going to assume here that the content you are going to post is something you can browse to in IE.) No Photoshop or other expensive tools are needed.
* First, find the image you want to add to your post by browsing to it in IE. Most likely this will be an image on some website I imagine, but don’t forget you can also display a local image in IE by simply dragging and dropping the image into IE from Windows Explorer.
* Now that you have the image displayed in IE, I imagine it’s too wide or tall for your blog. You’ll need to scale it down. There are two easy ways to do this: 1) Display the image and the image only in IE and then resize the IE window as needed. The displayed picture will resize automatically. Note: The setting Open Link in New Window must be enabled in the Tools | Options menu for this to work. 2) Resize IE content manually using Ctrl +/- or click on the percent sign at the right end of IE’s status bar until the content is sized the way you want it. (I prefer this approach because it allows me to capture more than just images as you’ll see in a bit, but if you need to resize an image off of the local drive, you’ll need to use the approach above.)
* Once the content is the desired size, fire up the Snipping Tool in Vista (All Programs | Assecories | Snipping Tool). Since I use this tool a lot I’ve added it to my Vista toolbar.
![]()
* Once the Snipping Tool is loaded you can use it to take a screenshot of the display. You have four options:
1) Capture an irregular/freee-form area
2) Capture a rectangular area (probably what you want)
3) Capture a window
4) Capture the whole screen
* One nice feature of the Snipping Tool is that with it you can add annotations to your image posts. However, don’t forget if you do, that the image size will be expanded as needed to allow for your ink. This may mean you need to capture a smaller original image.
* Once you have the image captured save it to a file somewhere and then use your blogging editor to upload that image to your server.
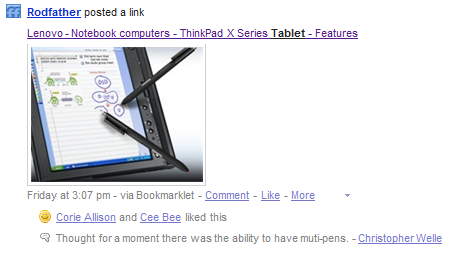
Here’s something I just captured and resized from FriendFeed for instance:
A couple last tips:
What about capturing and scaling screenshots? It would be nice if Vista’s Snipping Tool included a resize function directly. It would make capturing and resizing screenshots easier. But here’s a roundabout way to do the same thing. Use the snipping tool to capture a window let’s say. Then save the contents to a temporary file. Then drag the file into IE to display it in IE and use IE’s resizing capabilities as needed. Once the screenshot image is the desired size capture it again with the Snipping Tool. It’s a little bit of a pain, but if you don’t have Photoshop handy (or similar), it’s not too bad.
What about capturing video? Taking snapshots of video is one of the things I like about Vista. There is one issue: How do you capture the specific frame you want? Quite often with browser players, if you pause the image you’ll see a “Play” button appear over the paused video. That’s no good. To get around this I usually play the timing game. I start the video and then click the Snipping Tool icon I have in the Toolbar when the video is displaying the content I want to capture because the Snipping Tool will freeze the display at exactly that time–although you’ll hear the video continue to play in the background. Getting just the right frame is a lot trickier than it sounds. It may take several attempts. You’ll also find that you’ll want to launch the Snipping Tool just before the frame you’re wanting to capture is shown if the scene is changing fast. By the time the Snipping Tool is loaded the actual frame you want will hopefully appear.
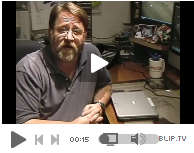
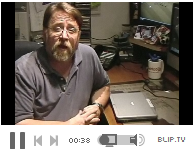
The image on the left was captured with the video paused and the image on the right was captured by launching the Snipping Tool at as close to the same exact moment in the video that I could get while the video was playing. As you can see it’s a bit tricky, but close enough.